Writerly Play Kit 006 – Structuring Ideas

Writerly Play Kit: 006

Structure Your Ideas With Style

WP Kit: 006

Structure Your Ideas with Style

Whether you’re a plotter or a pantser, the ability to step back and take a 30,000 foot view look at your project is essential. Whether you’re planning a new book, setting goals, or re-envisioning your office, there comes a point when you must think strategically … or accept the fact that you’re going to lose a lot of time wandering in the land of indecision.

Recently, I heard Brooke Castillo explain the need for strategic thinking in this way. Imagine you’re riding your bicycle somewhere far across town. You need to arrive where you’re headed urgently, so you pedal, pedal, pedal. But what if you took the time to get off the bike, climbed into your car, and fired up the GPS?

Sometimes we’re so committed to moving forward that we don’t stop to think about what might work more efficiently. Or, alternatively, we might resist strategic thinking because that’s not our biggest strength. Just as learning to be more playful in our thinking is key across every creative style, learning to be more strategic is important as well.

In this Writerly Play Kit, we’ll explore critical thinking tools and strategies that we can use to structure our stories, develop our ideas, and revise our lives and work.
 

Featured articles

CREATIVE LIFE

HOW TO reach a complex goal

Many writers spend a lot of time in their mental “Workshop,” structuring their stories, developing their writing craft, and revising their work. However, we may not apply those same cognitive skills to our careers and lives. Whether we’re storyboarding a work of fiction or our actual lives, the strategic thinking involved uses the same mental muscles. 

Do you have an exciting (and complex) goal? Let’s put those powerful mental muscles to work to figure out how to travel from where you are now to that big dream.

“We cannot solve our problems with the same thinking we used when we created them.”

-Albert Einstein

The Writerly Play WORKSHOP

To structure our ideas is a core skill used in the Writerly Play Workshop.

We visit this mental space when in order to think critically–practicing storytelling craft, developing ideas, and revising. 


Activities

Storyboard Like a Detective

FOR INVENTORS

Define the scenario, collect clues, and ultimately, resolve your questions. Capture your thinking on your storyboard.

Try This

Storyboard Like an Animator

FOR COLLABORATORS

Use the Hero’s Journey to structure your storyboard discussion with a collaborator.

Try This

Storyboard Like a Reporter

FOR ARCHITECTS

Structure your thinking about a project with a reporter’s questions. Use your discoveries to shape your storyboard.

Try This

Storyboard Like a Coach

FOR SPECIAL AGENTS

Run a few quick scenarios for your idea and then choose a game plan for your storyboard.

Try This

Wondering what Writerly Play is all about?

Writerly Play is designed to help you make the most of your creative potential. Each Writerly Play Kit is designed to help you stretch your thinking skills and develop practical strategies perfectly fit for you.

Want a shortcut? If you don’t have time to read today, but want a quick win, try this quick quiz to identify your creative strengths and weaknesses:

Once you know what works best for you, you need a perfect-for-you plan. Writerly Play functions more like a map rather than a cookie-cutter recipe. First, you’ll locate yourself on the map. Then, with a clear understanding of where you are, you can make informed choices about your next best steps.

Storyboard like a Detective

Storyboard like a Detective

Storyboard Like a Detective

Define the scenario, collect clues, and ultimately, resolve your questions. Capture your thinking on your storyboard.

Style

Inventor

Skill

Structuring Ideas

Time

15 – 45 minutes

THE WORKSHOP:

Storyboard Like a Detective

 Structured thinking can be difficult for Inventors. Approach the plotting process with a sense of play by tapping into your inner Sherlock Holmes. First define what you know about your storyline. Then, list your questions and choose a line of inquiry where you can start. Collect if-then clues to resolve those questions. Then, return to your list of questions. What is no longer relevant? What is still unresolved? Pick another line of inquiry, and repeat until you have a workable storyboard.

When should you storyboard your manuscript? There are a number of times in the writing process where working with a storyboard can be useful.

After idea generation, storyboarding will help you structure energetic brainstorming into a solid plan for your story. For me, the right moment is after I’ve done some full-plot brainstorming, and after I’ve drafted at least two or three scenes.

When drafting, storyboarding is an excellent get-unstuck tool. You might play a game or two to shake up your ideas and then use a storyboard to help you plug your new ideas into the plot. If you’ve already created a storyboard, you can play around with the variables to see if a change here or there might unstick your stuck moment. If not, a storyboard will give you increased clarity.

When revising, storyboarding is a powerful shortcut to help you see the effect of changes. Rather than trying to hold your entire plot in your mind while you experiment with possibilities, swap elements into and out of your storyboard to see how each change will impact your plot. Using this simplified view, you’ll be able to problem-solve with greater perspective and speed.

Materials

How to Play

  • Timer
  • Paper
  • Pencil
  • Colored Pencils (optional)
  • Index Cards
  • Posterboard, a White Board, or a Large Open Space (such as a wall, a tabletop, or the floor)

1. Set a timer for three minutes.

2. In that short time, capture what you know about your storyline. Stick to who, what, and where, and be as matter-of-fact as possible. Deal with any new shiny ideas the way Sherlock Holmes might … with a withering look and a dismissive attitude.

3. Considering your givens, and all of those ideas bouncing around in your mind, capture a list of questions. They might be “what if,” “why,” “how might,” or any other kind of question that needs to be solved for you to move forward.

4. Look over your list. Some questions will be related, some will be silly. Others will be clearly important. Choose a line of inquiry to follow.

5. Grab a stack of index cards. Decide how long you want to spend on the storyboard today. Save three-five minutes at the end of your work session to capture any thinking you haven’t captured on the board and don’t want to forget. Set your timer accordingly.

6. If this is your first draft of the storyboard, start your storyboard with the cards that relate to your givens. Then, use if-then thinking around your line of inquiry to define key scenes. Remember, you can always define a scene and an alternate, and decide to make your final choice later. Put one scene on each card, using an interesting title and images if you like.

7. If you’ve already created a storyboard for this project, begin with the cards on your board. Write new scenes on cards and add them to the board, pulling off cards that are no longer relevant.

8. When you reach problem spots, or gaps between one major scene and another, use your Sherlock Holmes logic to find a possible way from one scene to the next, and then test that theory. Does it work? What might strengthen it? Would an alternate option be better?

9. Depending on how much time you’ve allotted for this activity, you can spend time now experimenting with variables, or just capture the givens for a scene and plan to play with possibilities later when it’s time to draft that scene.

9. Wrap up your storyboarding session by writing yourself a quick set of notes about any outstanding questions. You might just highlight what’s left on your original list, or write a new summary.

Don’t forget! If you can’t store your storyboard as is, number your cards (in pencil) so it will be easy to lay them out in this same order again.

Try On Other Creative Styles

Storyboard Like a Coach

FOR SPECIAL AGENTS

Run a few quick scenarios for your idea and then choose a game plan for your storyboard.

Try This

Storyboard Like an Animator

FOR COLLABORATORS

Use the Hero’s Journey to structure your storyboard discussion with a collaborator.

Try This

Storyboard Like a Reporter

FOR ARCHITECTS

Structure your thinking about a project with a reporter’s questions. Use your discoveries to shape your storyboard.

Try This

Storyboard like a Coach

Storyboard like a Coach

Storyboard Like a Coach

Run a few quick scenarios for your idea and then choose a game plan.

Style

Special Agent

Skill

Structuring Ideas

Time

15 -30 mins

THE WORKSHOP:

Storyboard Like a Coach

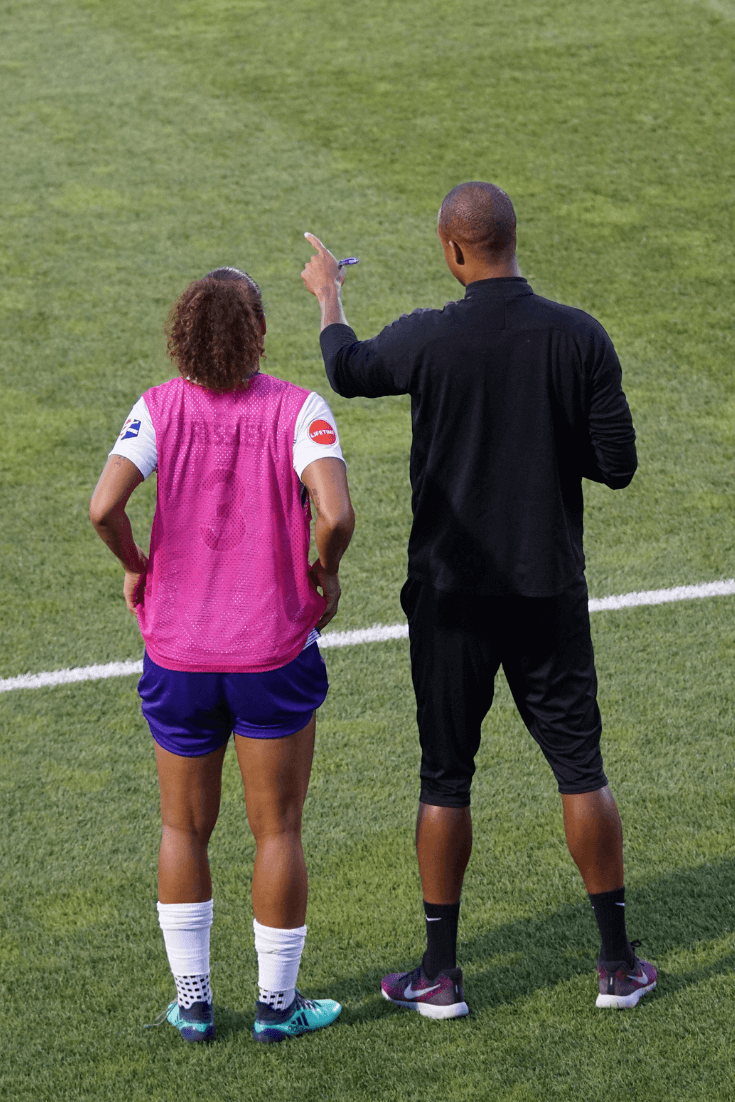
Imagine yourself in a locker room with a white board, going over game play with your coach. In this version of storyboarding, you sketch your possibilities out as quickly as possible, and then snap a photo of what you think will work better. You don’t have to know all the specifics, just the general movements across the field. Plus, you can plan for the surprises that might pop up along the way.

When should you storyboard your manuscript? There are a number of times in the writing process where working with a storyboard can be useful.

After idea generation, storyboarding will help you structure energetic brainstorming into a solid plan for your story. For me, the right moment is after I’ve done some full-plot brainstorming, and after I’ve drafted at least two or three scenes.

When drafting, storyboarding is an excellent get-unstuck tool. You might play a game or two to shake up your ideas and then use a storyboard to help you plug your new ideas into the plot. If you’ve already created a storyboard, you can play around with the variables to see if a change here or there might unstick your stuck moment. If not, a storyboard will give you increased clarity.

When revising, storyboarding is a powerful shortcut to help you see the effect of changes. Rather than trying to hold your entire plot in your mind while you experiment with possibilities, swap elements into and out of your storyboard to see how each change will impact your plot. Using this simplified view, you’ll be able to problem-solve with greater perspective and speed.

Materials

How to Play

  • Timer
  • White Board
  • Dry erase markers
  • Camera

1. Set a timer for three minutes.

2. In that short time, mentally play through your story.

  • How does the story begin?
  • What key things happen in the middle?
  • Where and how does the climax take place?
  • Why does this problem or opportunity matter to your character?
  • How does the story resolve?

3. Once the time is up, it’s time to storyboard. Grab your dry erase markers. Decide how long you want to spend on the storyboard today. Save three-five minutes at the end of your work session to capture any thinking you haven’t captured on the board and don’t want to forget. Set your timer accordingly.

4. If this is your first draft of the storyboard, draw out a simple map of your story on the board. Use simple symbols, as a coach would (think x’s and o’s), and labels where they’re helpful.

5. If you’ve already created a storyboard for this project, reference your past material. You might have a photo or the actual board. You can use those pieces of info to help sketch this map.

6. When you reach problem spots, or gaps between one major scene and another, think like a play-maker. If this problem arises, how might I bypass it? How might I use it to my benefit?

7. Depending on how much time you’ve allotted for this activity, you can spend time now experimenting with variables, or just capture the givens for a scene and plan to play with possibilities later when it’s time to draft that scene.

8. Wrap up your storyboarding session by writing yourself a quick set of notes. What is left to be considered? Are certain sections of the plan weaker than others? Note whatever you don’t want to forget and keep those notes with your photo of the completed white board.

Try On Other Creative Styles

Storyboard Like a Detective

FOR INVENTORS

Define the scenario, collect clues, and ultimately, resolve your questions. Capture your thinking on your storyboard.

Try This

Storyboard Like an Animator

FOR COLLABORATORS

Use the Hero’s Journey to structure your storyboard discussion with a collaborator.

Try This

Storyboard Like a Reporter

FOR ARCHITECTS

Structure your thinking about a project with a reporter’s questions. Use your discoveries to shape your storyboard.

Try This

Storyboard like a Reporter

Storyboard like a Reporter

Storyboard like a Reporter

Structure your thinking about a project with a reporter’s “w” questions and then use your discoveries to shape your storyboard.

Style

Architect

Skill

Structuring Ideas

Time

15 – 45 minutes

THE WORKSHOP:

Storyboard like a Reporter


When reporters gather the elements of a story, they look for the who, what, where, when, why, and how. As an Architect, you can play to your strengths by using these questions in both phases of the storyboarding process. When you’re storyboarding your overall plot arc, use these categories to guide your big-picture thinking to make sure you’ve covered your bases. When you’re dealing with the details of each scene and problem-solving, use the categories to focus your attention on what matters most.

When should you storyboard your manuscript? There are a number of times in the writing process where working with a storyboard can be useful.

After idea generation, storyboarding will help you structure energetic brainstorming into a solid plan for your story. For me, the right moment is after I’ve done some full-plot brainstorming, and after I’ve drafted at least two or three scenes.

When drafting, storyboarding is an excellent get-unstuck tool. You might play a game or two to shake up your ideas and then use a storyboard to help you plug your new ideas into the plot. If you’ve already created a storyboard, you can play around with the variables to see if a change here or there might unstick your stuck moment. If not, a storyboard will give you increased clarity.

When revising, storyboarding is a powerful shortcut to help you see the effect of changes. Rather than trying to hold your entire plot in your mind while you experiment with possibilities, swap elements into and out of your storyboard to see how each change will impact your plot. Using this simplified view, you’ll be able to problem-solve with greater perspective and speed.

Materials

How to Play

  • Timer
  • Paper
  • Pencil
  • Index Cards
  • Posterboard, a White Board, or a Large Open Space (such as a wall, a tabletop, or the floor)

1. Set a timer for three minutes.

2. In that short time, summarize your story by answering the following questions. Make sure to use quick bullet points rather than long-form sentences.

  • Who is your story about?
  • What problem or opportunity shows up in the story?
  • Where and when (in general) does the story take place?
  • Why does this problem or opportunity matter to your character?
  • How do they tackle it? How does the story resolve?

3. Once the time is up, it’s time to storyboard. Grab a stack of index cards. Decide how long you want to spend on the storyboard today. Save three-five minutes at the end of your work session to capture any thinking you haven’t captured on the board and don’t want to forget. Set your timer accordingly.

4. If this is your first draft of the storyboard, use your summary to spark ideas for the scenes you need. Put one scene on each card, using an interesting title.

5. If you’ve already created a storyboard for this project, compare your current summary to the cards on your board. Write new scenes on cards and add them to the board, pulling off cards that are no longer relevant.

6. When you reach problem spots, or gaps between one major scene and another, use your reporter questions to define scene possibilities.

  • Who could be in the scene?
  • What needs to happen?
  • Where and when might the scene take place?
  • Why would it be important to your character?
  • How would your main character act? How would others in the scene act?

7. Depending on how much time you’ve allotted for this activity, you can spend time now experimenting with variables, or just capture the givens for a scene and plan to play with possibilities later when it’s time to draft that scene.

8. Wrap up your storyboarding session by writing yourself a quick set of notes about any outstanding issues.

  • Who needs additional scenes or growth in the story?
  • What scenes need to be developed more strongly, reconsidered, or added?
  • Is there any room to experiment with your where and when in particular areas of your story?
  • Is the why ever unclear? What motivations should you spend more time thinking about?
  • How strong are the actions of your key characters? Are there areas where you’d like to take a second look?

Don’t forget! If you can’t store your storyboard as is, number your cards (in pencil) so it will be easy to lay them out in this same order again.

Try On Other Creative Styles

Storyboard Like a Detective

FOR INVENTORS

Define the scenario, collect clues, and ultimately, resolve your questions. Capture your thinking on your storyboard.

Try This

Storyboard Like an Animator

FOR COLLABORATORS

Use the Hero’s Journey to structure your storyboard discussion with a collaborator.

Try This

Storyboard Like a Coach

FOR SPECIAL AGENTS

Run a few quick scenarios for your idea and then choose a game plan for your storyboard.

Try This

Storyboard like an Animator

Storyboard like an Animator

Storyboard like an Animator

Use the Hero’s Journey to structure your storyboard discussion with a collaborator.

Style

Collaborator

Skill

Structuring Ideas

Time

15 – 45 mins

THE WORKSHOP:

Storyboard like an Animator

You may not work at your favorite animation studio, but that doesn’t mean you can’t approach your next storyboarding session with a playful attitude. Simply working with a collaborator will start you off on the right foot. Together, you can act out scenes, play with possibilities, and crack jokes. Use colorful tools and sketches, too, to keep the process fun. To structure and focus your conversation, start with a simple Hero’s Journey framework and elaborate from there.

When should you storyboard your manuscript? There are a number of times in the writing process where working with a storyboard can be useful.

After idea generation, storyboarding will help you structure energetic brainstorming into a solid plan for your story. For me, the right moment is after I’ve done some full-plot brainstorming, and after I’ve drafted at least two or three scenes.

When drafting, storyboarding is an excellent get-unstuck tool. You might play a game or two to shake up your ideas and then use a storyboard to help you plug your new ideas into the plot. If you’ve already created a storyboard, you can play around with the variables to see if a change here or there might unstick your stuck moment. If not, a storyboard will give you increased clarity.

When revising, storyboarding is a powerful shortcut to help you see the effect of changes. Rather than trying to hold your entire plot in your mind while you experiment with possibilities, swap elements into and out of your storyboard to see how each change will impact your plot. Using this simplified view, you’ll be able to problem-solve with greater perspective and speed.

Materials

How to Play

  • Timer
  • Paper
  • Colored Pencils
  • Index Cards
  • Post-Its
  • Posterboard, a White Board, or a Large Open Space (such as a wall, a tabletop, or the floor)

1. Decide whether you’ll work on one of your stories, or if you’ll split the time in two and work on each of your stories for half of your time. Adjust your timing accordingly.

2. Set a timer for five minutes.

3. In that short time, capture the main points in your story using a Hero’s Journey frame. Here are the stages as I often plan through them:

  • Ordinary Life – What are your main character’s circumstances? How do we see their strengths and weaknesses in action?
  • Call to Adventure – How does the story’s challenge or opportunity show up?
  • Crossing the Threshold – What happens as soon as the character says yes to the adventure? Or, what happens when they’re forced into it against their will?
  • Belly of the Whale – What are the stakes, now that the adventure has begun? How might you show the stakes in a scene?
  • A Wise Advisor – Who shows up to provide aid, information, or training for your character? (This stage can happen here, or sometimes it happens before the character crosses the threshold.)
  • Three Trials – Your story will have the amount of trials that makes the most sense to you. I start by breaking the trials into three sections, each driven by a specific objective that my main character pursues. From there, I identify what doesn’t fit and experiment.
  • Wrestling the Dragon – What about the climax is inevitable? What surprises your main character?
  • The Boon – What physical or intangible boon(s) does your character take away from the encounter with the dragon?
  • The Journey Home – What situation tests your main character’s newfound skill and/or treasure?
  • Home Again – How does “real life” begin again for your character? How might you use circumstances to show how they’ve changed? How does their growth impact their community?

4. Once the time is up, it’s time to storyboard. Grab a stack of index cards. Decide how long you want to spend on the storyboard today. Save three-five minutes at the end of your work session to capture any thinking you haven’t captured on the board and don’t want to forget. Set your timer accordingly.

5. If this is your first draft of the storyboard, use your Hero’s Journey to spark ideas for the scenes you need. Some elements will play out in one scene. Others will require more than one. Create an interesting title for each scene, and (if you like) sketch key images. Each index card should represent only one scene.

6. If you’ve already created a storyboard for this project, compare your Hero’s Journey to the cards on your board. Write new scenes on cards and add them to the board, pulling off cards that are no longer relevant.

7. When you reach problem spots, or gaps between one major scene and another, bounce ideas off one another. Try acting moments out, tossing possibilities back and forth, or sketch options on your own and then compare and decide.

8. Depending on how much time you’ve allotted for this activity, you can spend time now playing around with options, or push yourself to keep moving. If you’re speeding through, capture the givens for each important scene. You can play with possibilities later when it’s time to draft.

9. Wrap up your storyboarding session by capturing any outstanding issues. Grab a stack of post-its, and write “How might I … ” questions on each. As you post each thought on the wall, your collaborator’s questions should enrich your thinking. Snap a photo of your post-its before taking them down.

Don’t forget! If you can’t store your storyboard as is, number your cards (in pencil) so it will be easy to lay them out in this same order again.

Try On Other Creative Styles

Storyboard Like a Detective

FOR INVENTORS

Define the scenario, collect clues, and ultimately, resolve your questions. Capture your thinking on your storyboard.

Try This

Storyboard Like a Reporter

FOR ARCHITECTS

Structure your thinking about a project with a reporter’s questions. Use your discoveries to shape your storyboard.

Try This

Storyboard Like a Coach

FOR SPECIAL AGENTS

Run a few quick scenarios for your idea and then choose a game plan for your storyboard.

Try This